This note is the second part of my notes on Amazon ElastiCache for Memcached. In the first note, I demonstrated how to create an Amazon ElastiCache for Memcached using Terraform. In this note, I list the steps to create the additional infrastructure and access the Memcached cluster using Python.
To accomplish the use-case, I’ll use the two AWS Cloud resources created in the previous note for this purpose - (a) the aws_ssm_parameter resource that has the ElastiCache configuration_endpoint and (b) the aws_iam_policy that enables access to the SSM Parameter Store parameter.
At a high level, this use case can be classified into three steps:
(1) Create the additional AWS Cloud resources to access the ElastiCache cluster.
(2) Access the ElastiCache cluster from an Amazon EC2 instance to write to the ElastiCache cluster.
(3) Access the ElastiCache cluster from an Amazon EC2 instance to read from the ElastiCache cluster.
I will explain these steps in detail. If you are interested in following along, please check my repository GitHub:kunduso/amazon-elasticache-memcached-tf.
1. Create the additional AWS Cloud resources to access the ElastiCache cluster
In my previous note, I discussed most of the infrastructure for this use case, such as the Amazon Virtual private cloud, subnets, route tables, security groups, Amazon ElastiCache, and the SSM parameter store to store the ElastiCache endpoint. However, since I am connecting to the ElastiCache cluster from an Amazon EC2 instance using Python, I need additional AWS cloud resources. These are:
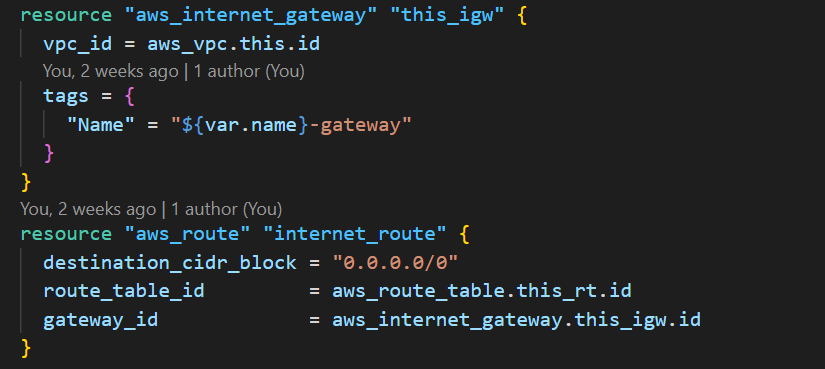
- an Internet Gateway and a route to the Internet,
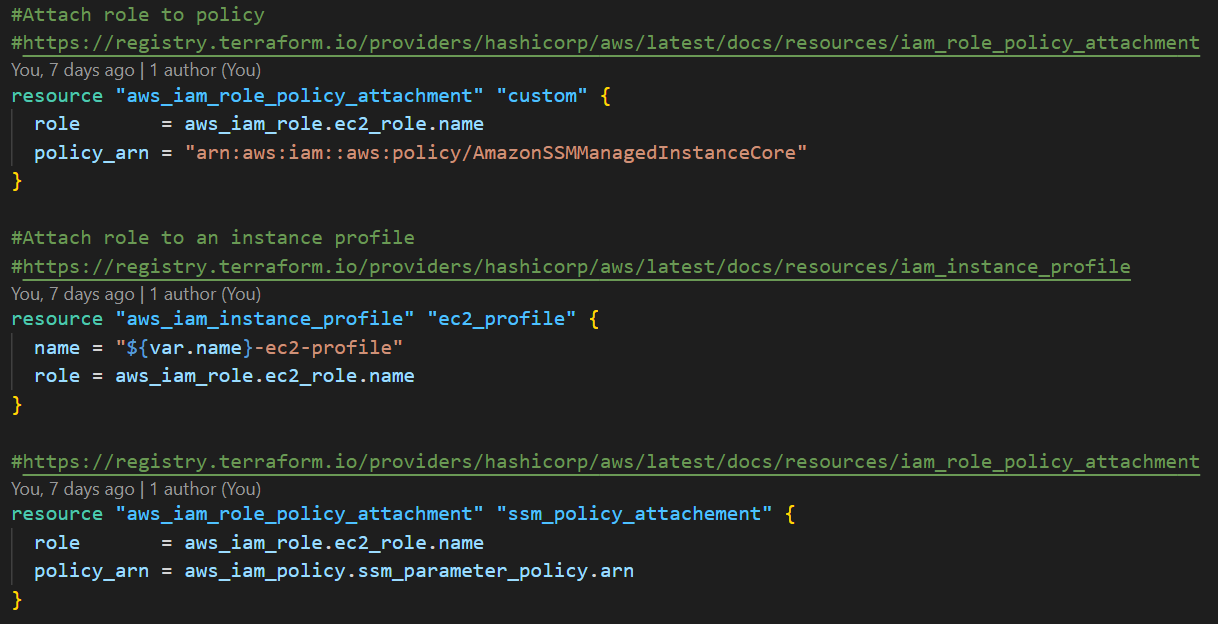
- an IAM policy and instance profile to access the Amazon EC2 instance and
- the Amazon EC2 instances to access the ElastiCache cluster.
This use case requires Internet access for a specific purpose. Since I am using Python3 to access the Amazon ElastiCache cluster, there are particular libraries to install on the Amazon EC2 instance, such as python-pip, python3, pylibmc, and boto3. The Amazon EC2 instances require Internet access to install these libraries. That is possible by attaching an Internet Gateway to the Amazon VPC and adding a route in the route table.
 So, if you have an Amazon machine image (AMI) with these Python libraries installed, you do not require an Internet Gateway or the route.
Since I connected to the ElastiCache cluster from an Amazon EC2 instance, the instance required specific permissions. In my previous note, I created an IAM policy that had permission to access the ElastiCache endpoint stored in the SSM parameter store. I attached the IAM policy to an IAM role that the Amazon EC2 instance uses. Since I was required to access the Amazon EC2 instance via Session Manager, I also attached an AWS-managed policy to the IAM role.
So, if you have an Amazon machine image (AMI) with these Python libraries installed, you do not require an Internet Gateway or the route.
Since I connected to the ElastiCache cluster from an Amazon EC2 instance, the instance required specific permissions. In my previous note, I created an IAM policy that had permission to access the ElastiCache endpoint stored in the SSM parameter store. I attached the IAM policy to an IAM role that the Amazon EC2 instance uses. Since I was required to access the Amazon EC2 instance via Session Manager, I also attached an AWS-managed policy to the IAM role.
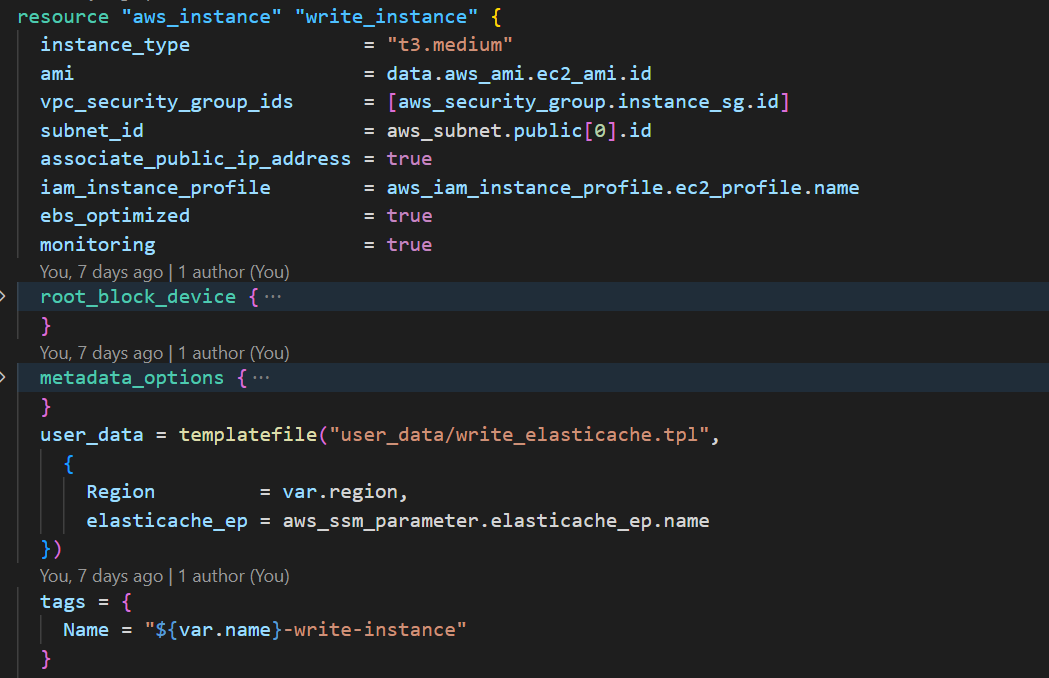
 The last AWS cloud resources are the two Amazon EC2 instances. My idea was to create two Amazon EC2 instances, one to write into the ElastiCache cluster and the other to read from the ElastiCache cluster. Using the user data script, I created a Python file and stored it in the
 var folder of the two Amazon EC2 instances. Hence, both the Amazon EC2 instances use separate user data scripts. I also passed the ElastiCache endpoint address to the Python file. Below is an image of one of the Amazon EC2 instances’ Terraform code.
 These were all the additional AWS cloud resources required for this use case. I checked-in my code and merged it with the
 main branch. That triggered the GitHub Actions pipeline and provisioned all the AWS cloud resources.
After all the cloud resources were provisioned, I waited an additional 5 minutes since the Amazon EC2 instances had the user data script to run, install a few packages, and create the Python file.
2. Access the ElastiCache cluster from an Amazon EC2 instance to write to the ElastiCache cluster
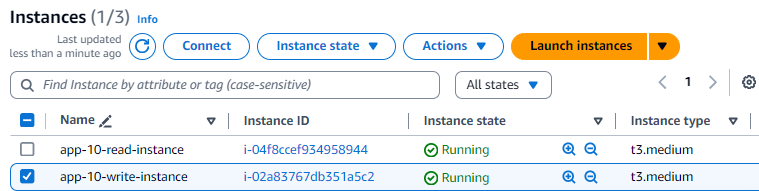
I selected the Amazon EC2 instance named app-10-write-instance and clicked the Connect button to connect via Session Manager. I could log into the Amazon EC2 instance since I had the correct AWS-managed policy and appropriate security group rule attached to it. You can read more about that at provision-an-amazon-ec2-instance-with-session-manager-access-using-terraform. In particular, read about the Security Group attached to the Amazon EC2 instance since no ingress rule is associated.
 After logging in, I navigated to the
 var folder and ran the ls command. I could see the user data generated write_cache.py file. I ran python3 write_cache.py, which prompted me to enter a City name.
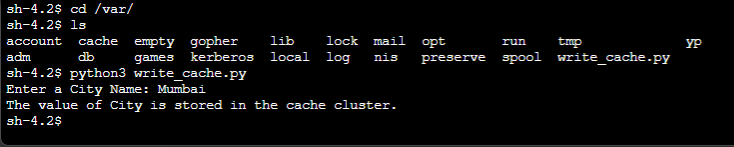 The last message confirmed the information was successfully stored in the ElastiCache cluster using the Python code.
3. Access the ElastiCache cluster from an Amazon EC2 instance to read from the ElastiCache cluster
I repeated the same steps on the other Amazon EC2 instances—app-10-read-instance—and logged in via Session Manager. Then, I navigated to the /var folder and ran the Python file python3 read_cache.py. The correct value was printed. As part of the execution, the Python script connected to the ElastiCache cluster and read the value the other Python script wrote.
 You can iterate through Steps 2 and 3 multiple times with different values.
And that brings us to the end of this note. I recommend you
You can iterate through Steps 2 and 3 multiple times with different values.
And that brings us to the end of this note. I recommend you cat open the two Python files to review their contents. You will see that the files do not contain any sensitive value, such as the ElastiCache endpoint. Access to the endpoint value is managed via the IAM role attached to the Amazon EC2 instance.
If you want to learn how to connect to an Amazon ElastiCache for Redis, you can examine connect-to-an-amazon-elasticache-cluster-from-an-amazon-ec2-instance-using-python. I hope you found this note helpful. Let me know if you have any questions or suggestions.