HCP (HashiCorp Cloud Platform) Terraform is a managed service that allows cloud infrastructure engineers to provision, manage, and scale infrastructure using Terraform securely, efficiently, and in an automated manner. It eliminates the need to maintain a Terraform infrastructure, such as the underlying execution environment and state management. It provides a hassle-free way to manage cloud resources while leveraging Terraform’s powerful infrastructure-as-code capabilities.
In open-source Terraform, the cloud infrastructure engineering team has to manage the setup and maintenance of the Terraform execution environment, including configuring backends for state storage, ensuring secure access to sensitive credentials, and handling the scaling and reliability of Terraform execution servers. They are also responsible for managing the state files, version control, and addressing potential collaboration issues, such as state file locking and coordination between team members.
In contrast to the complexities of managing infrastructure with open-source Terraform, HCP Terraform simplifies these processes by managing the execution environment maintenance, state management, and scaling. This allows teams to focus more on the business logic of their infrastructure. This note demonstrates how I followed the Get Started - HCP Terraform. Per the guide, currently, HCP Terraform supports three workflows, and I’ll be using the UI/Version Control System driven workflow.
1. Create a free account and Organization at HCP Terraform
The first step to using HCP Terraform is to create an account. You can create an Organization with your first login to this portal. All you need is an email address and access to the email to verify that it is yours.
 2. Create a project in HCP Terraform
After creating an organization, the next step was to create a Project to host all the information related to provisioning the AWS cloud resources. Although a Default Project was available, I created a new one for this use case.
2. Create a project in HCP Terraform
After creating an organization, the next step was to create a Project to host all the information related to provisioning the AWS cloud resources. Although a Default Project was available, I created a new one for this use case.
 I selected Projects → New Project on the left-hand vertical pane to create a new project. I named the project app-two. Please choose a name that is suitable to your use case. Please refer to the Terraform-Docs for more information on HCP Terraform Projects.
3. Create a GitHub repository
I created a folder (Get-Started-HCP-Terraform) in my GitHub repository: kunduso/LearnTerraform for this use case and then checked out a branch add-hcp-tf to add the foundational Terraform configuration for this project. If you compare the repository code with an open-source Terraform configuration, the only difference is that it has the cloud {} block with the organization and workspaces{} configuration.
 This repository also contained the code to provision a few AWS cloud resources.
Please Note: Making development changes in a non “main” branch is good programming practice. Moreover, I intended to demonstrate how HCP Terraform Runs execute on Pull Request (PR), and hence, I made code changes that could be merged to the main branch via a PR.
4. Create a workspace in HCP Terraform
Workspace is an essential concept with HCP Terraform, so if you are unfamiliar with it, please read about it at - HCP Terraform Workspaces. Then, back on the HCP Terraform console under the project (app-two), there was a provision to create a new workspace.
 Select New → Workspace.
 I selected the Version Control Workflow and then was presented with the option of choosing a GitHub repository.
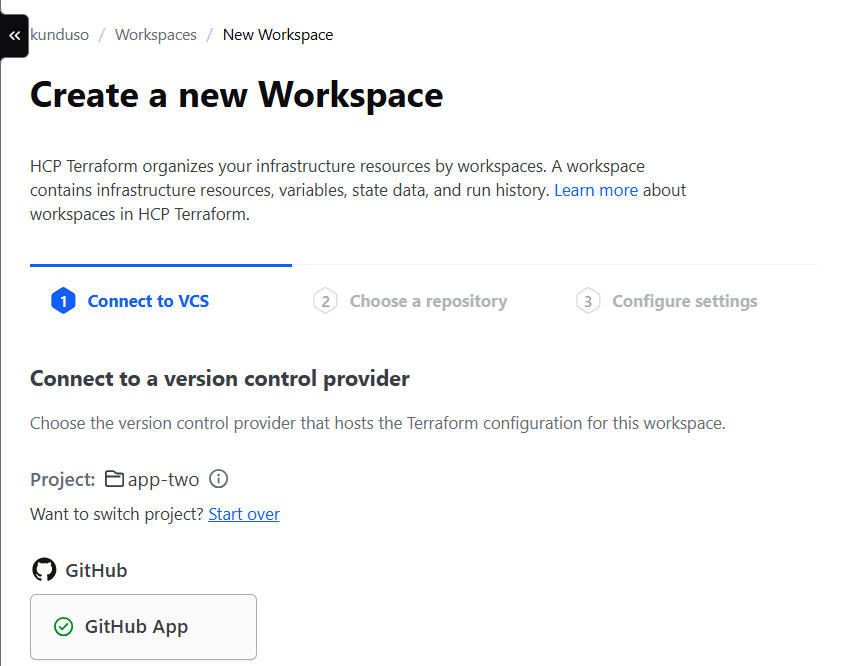 I selected my GitHub account and repository,
 kunduso/LearnTerraform after which I could configure the Workspace.
 I gave the same workspace name specified in the Terraform configuration in my GitHub repository and clicked Create.
 After the Workspace was created, I reviewed all its properties, such as Run Tasks, Run Triggers, and Version Control. These properties are available under Workspace settings.
 I found the Version Control option particularly interesting since it contained essential configurations such as the working directory, the VCS triggers, and the Automatic Run triggering. Since the code in my repository was in the
 Get-Started-HCP-Terraform folder, I set that value as the Terraform working directory.
 After reviewing the Workspace Settings, I navigated to the Workspace and selected Variables. This is where I stored the Workspace variables, such as the
 access_key and secret_key, and marked them as sensitive so that the values wouldn’t be displayed in any logs.
 Those are all the settings required to get started on the HCP Terraform platform. The next step was to create a Pull Request to merge the code changes into the main branch.
5. Create a Pull Request in GitHub
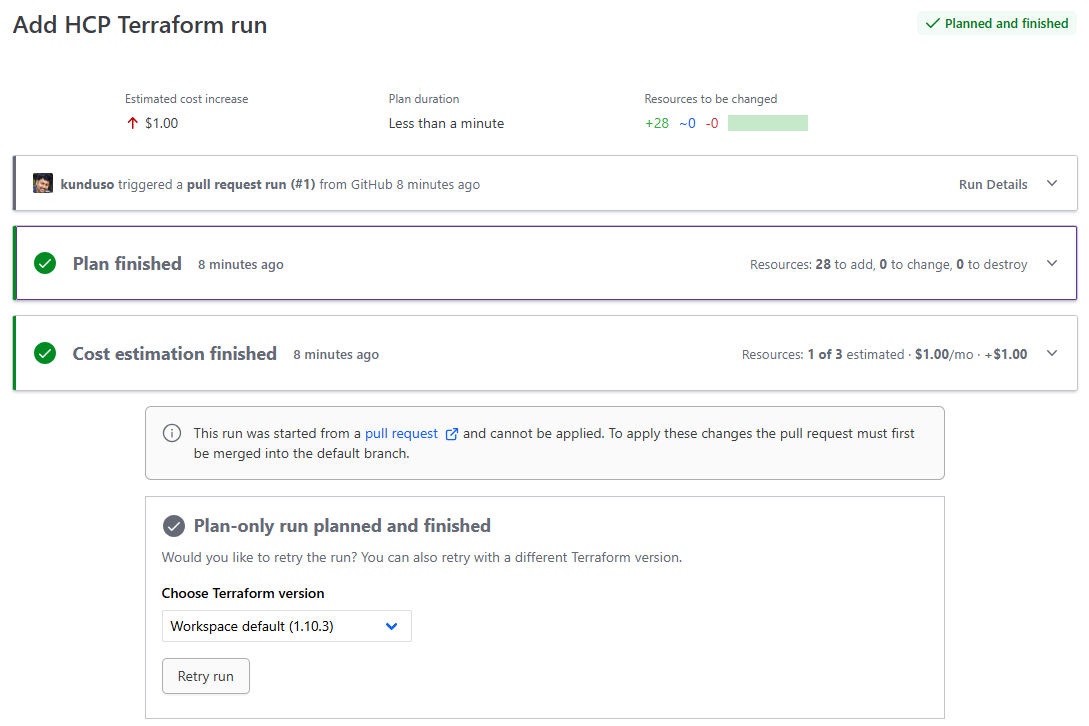
I created a Pull Request on the GitHub portal to merge the changes to the master branch. After I created a Pull Request in GitHub, I could see that a terraform plan step started and finished successfully in HCP Terraform → Workspace → app-two-layer-0 → Runs.
 Under the latest Workspace run, I could review a list of the resources that would be created once the changes are merged into the
 master branch. I could also examine the cost estimates that were a part of the terraform plan step, which was helpful.
 6. Merge changes to the main branch
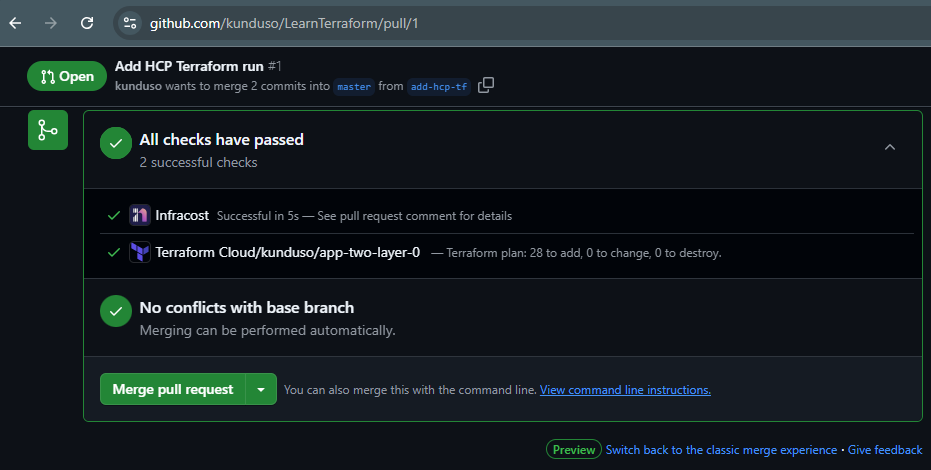
Since the changes looked good, I was ready to merge them into the
6. Merge changes to the main branch
Since the changes looked good, I was ready to merge them into the master branch from the GitHub portal.
 On doing so, another (HCP Terraform) Workspace Run was triggered and was waiting for my review and approval before the
 terraform apply step was run.
 For details on the state of the Workspace run, I clicked on the Run Title, and the request navigated to the details page, as shown below.
 At this stage, I could apply or discard the workspace run. Since this looked good, I chose the Confirm & apply button, which continued the same workspace run.
 After the successful run, I reviewed the Workspace and found a new file under the States.
 This is the state file with information about the AWS cloud resources provisioned by HCP Terraform from the configurations stored in the GitHub repository: kunduso/LearnTerraform.
That brings us to the end of this use case: how to provision AWS cloud resources using HCP Terraform with the configuration stored in a GitHub repository. If you have experience working with open-source Terraform, managing AWS cloud resources using HCP Terraform has no significant learning curve.
In summary, HCP Terraform offers a secure and scalable way to manage cloud infrastructure, significantly reducing the complexities of using open-source Terraform. While it may not be for all cloud engineering teams, especially those needing high levels of customization, its ease of use makes it an excellent choice for teams looking to streamline their workflows. Whether you’re just starting or have experience with Terraform, I encourage you to explore the platform and leverage its full potential. For further learning, dive into the HashiCorp documentation or join the community for more tips and discussions.